Create and use a custom log sink
In this exercise you will add a custom sink to the logging
configuration which will send the log entries to the Console
standard output. You will then reconfigure the application to
monitor the log events in real-time.
First step
Create a custom log sink
-
In Visual Studio add the following references;
- Microsoft.Practices.EnterpriseLibrary.Configuration.dll
(All Blocks depend on the Configuration Application Block for handling configuration files etc. You must include this assembly for the configuration of our custom sink). - Microsoft.Practices.EnterpriseLibrary.Logging.dll
(Contains the logging application block base classes).
-
Add the following namespaces.using Microsoft.Practices.EnterpriseLibrary.Configuration;
using Microsoft.Practices.EnterpriseLibrary.Logging;
using Microsoft.Practices.EnterpriseLibrary.Logging.Sinks;
using Microsoft.Practices.EnterpriseLibrary.Logging.Distributor.Configuration;
- Microsoft.Practices.EnterpriseLibrary.Configuration.dll
-
-
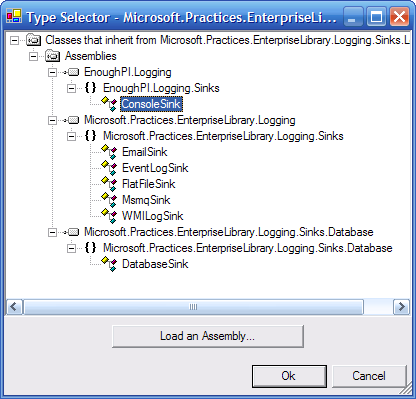
public class ConsoleSink: LogSink
{
private LoggingConfigurationView configView;public override void Initialize(ConfigurationView configurationView)
{
this.configView = configurationView as LoggingConfigurationView;
}protected override void SendMessageCore(LogEntry logEntry)
{
CustomSinkData sinkData;
sinkData = (CustomSinkData) this.configView.GetSinkData(this.ConfigurationName);// Delimit each log entry
Console.WriteLine((string) sinkData.Attributes["delimiter"]);// Write the formatted log entry to the Console
Console.WriteLine(FormatEntry(logEntry));
}
}
Note: The base class is LogSink, which
mandates that you override two abstract methods (Initialize
and SendMessageCore). The
Initialize method allows us to get
access to the ConfigurationView (ie. a
view of the configuration parameters as specified in the
configuration files). The SendMessageCore
method is invoked by the logging infrastructure
to send the message to the log sink.
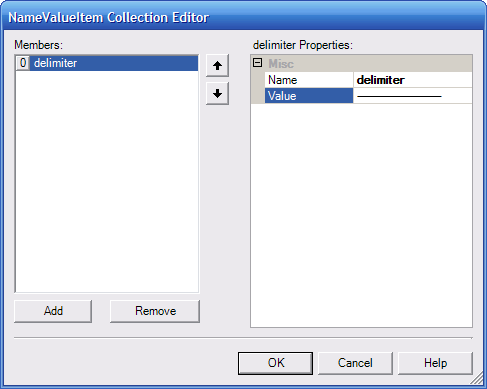
The ConsoleSink Classis expecting a
parameter, named delimiter, be defined
in the configuration of this custom log sink.
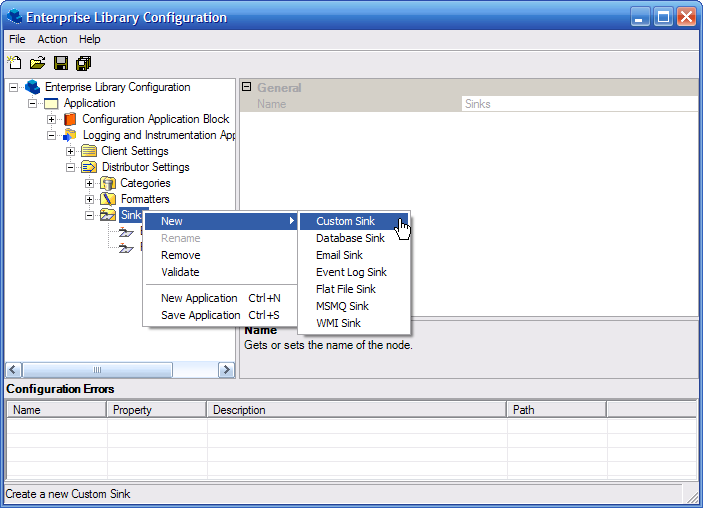
Using a custom sink
-
-
-
-
-

-
-
-

-
-
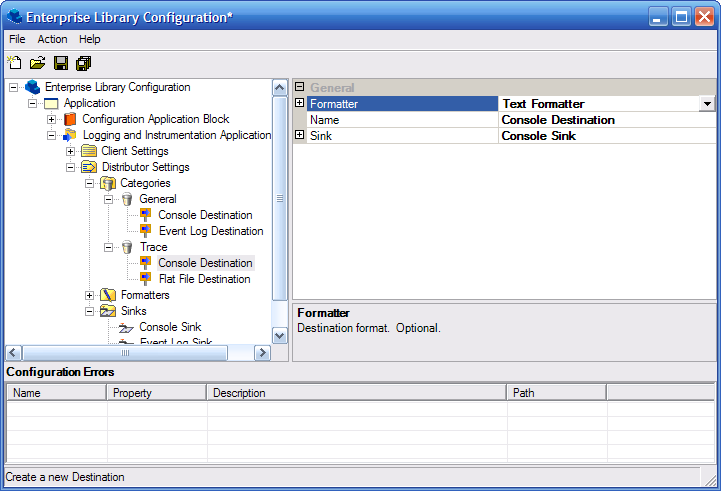
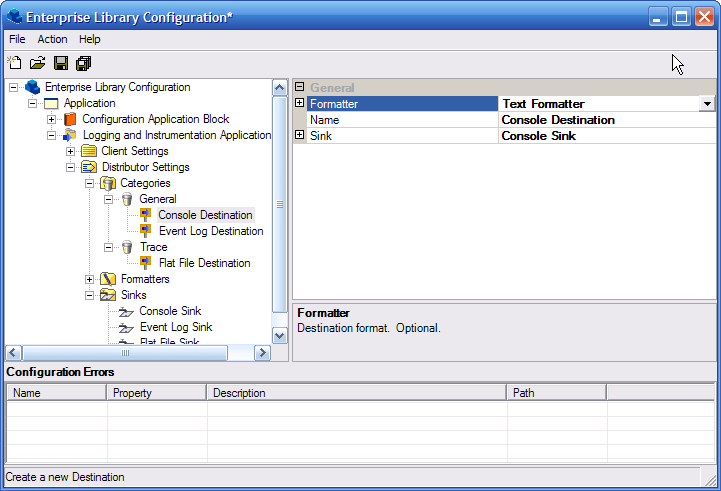
Right click the General category of the Logging and Instrumentation Application Block Distributor Settings. Select the New | Destination menu command.

-
Set the following properties for the destination.
- Formatter = Text Formatter,
- Name = Console Destination, and
- Sink = Console Sink.
-